Overall, Ableton is a powerful, flexible software offering a unique music production and performance approach. In this article, we provide a practical guide on how to open a piano roll in Ableton.
Ableton Live is a popular digital audio workstation (DAW) software. It offers an intuitive interface, real-time performance capabilities, and a wide range of built-in features and tools. These features make it a favored choice for musicians and producers of all skill levels.
Table of Contents
What is a Piano Roll?
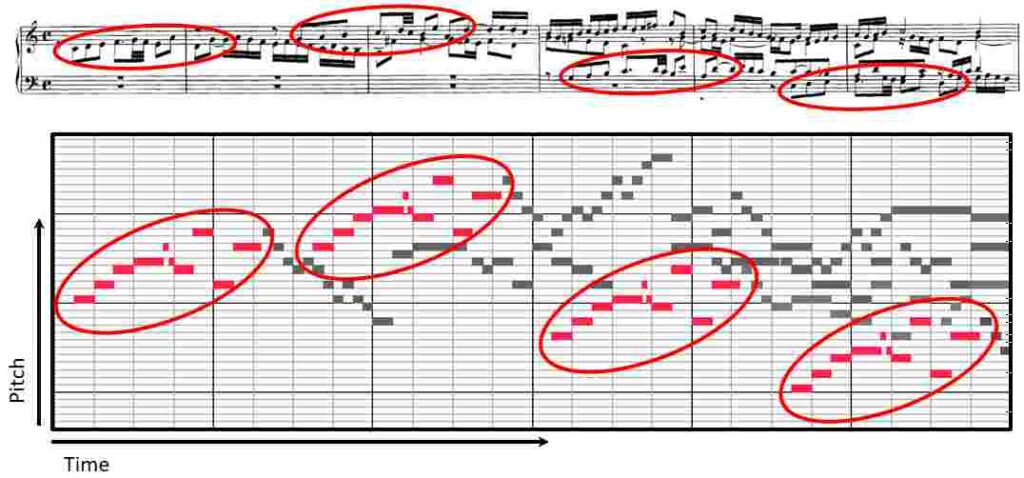
A piano roll is a type of music storage medium used in mechanical player pianos, which were popular in the late 19th and early 20th centuries. It is a long strip of paper or cardboard with perforations corresponding to a piano’s notes. As the roll is fed through the player piano, the perforations activate a series of pneumatic valves that control the piano’s hammers, producing music without needing a human performer.
Today, the term “piano roll” is also used to refer to the graphical interface used in digital audio workstations (DAWs) to edit and program MIDI notes. In this context, the piano roll visually represents the notes and rhythms of a MIDI clip. The clip can be edited and arranged in various ways.
The user interface typically includes a grid of vertical lines representing time and horizontal lines representing pitch. The note events are displayed as squares or rectangles within the grid. Users can edit the timing, pitch, velocity, and duration of individual notes, add and remove notations, and change the tempo and meter of a clip. The piano roll is a powerful and essential tool for music production, sound design, and live performance in modern digital music-making.
Ableton Company Background
Ableton is a company that develops and sells the popular music software Ableton Live. The company was founded in Berlin, Germany, in 1999 by Robert Henke, Gerhard Behles, and Bernd Roggendorf to create innovative software and hardware tools for musicians and producers.
Since the release of Ableton Live in 2001, the company has become one of the leading music software developers, with a strong focus on the needs of live performers and electronic music producers. In addition to Ableton Live, the company offers various software tools and hardware products, including Max for Live, Push controllers, sound libraries, and sample packs.
Ableton has a global user base and a strong community of users and developers who contribute to the ongoing development and innovation of the software. The company also hosts various events and workshops, both online and in-person, to support and educate its user community.
Does Ableton Have a Piano Roll?
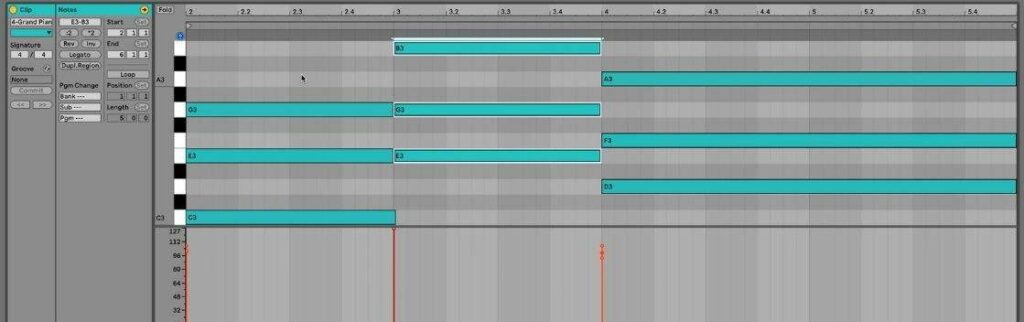
Ableton Live has a piano roll, which is a graphical interface for creating and editing MIDI notes. The piano roll in Ableton Live allows users to easily input, edit, and manipulate MIDI notes for virtual instruments and other MIDI-compatible devices.
In the piano roll, MIDI notes are displayed as horizontal bars representing their pitch, duration, and velocity. Users can click and drag these bars to adjust the timing, length, and other parameters of the notes and can also use various tools and shortcuts to create and edit complex musical patterns quickly.
How to Open Piano Roll In Ableton
The MIDI Note Editor, also known as Piano Roll, in Ableton Live, is a key feature that allows users to edit and program MIDI notes for many instruments. You can edit notes that you input through a keyboard. Additionally, you can create notes from scratch by drawing them. Here, we’ll go through the steps on how to open the piano roll in Ableton.
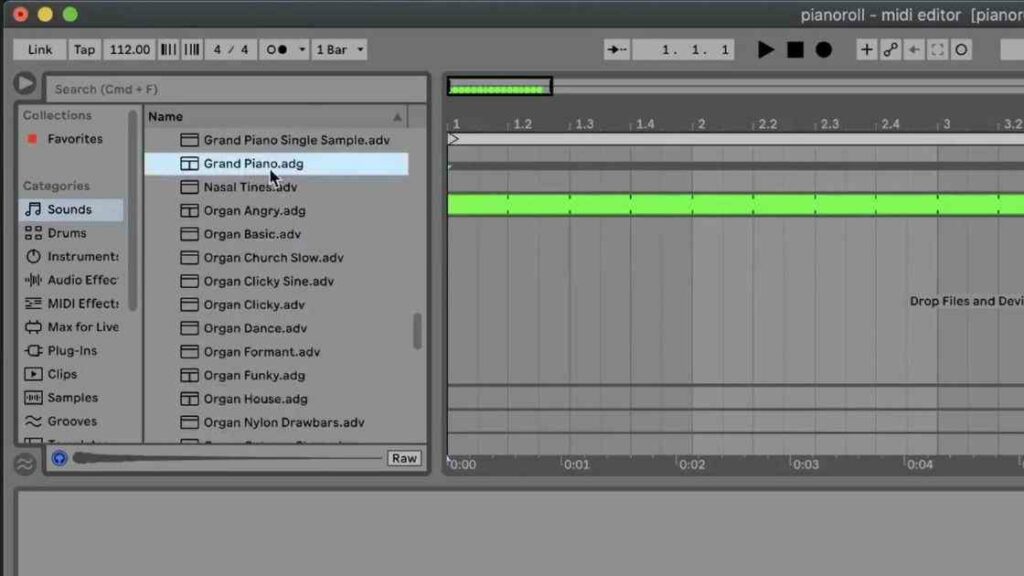
Step 1: Load a MIDI Instrument
Before opening the piano roll, a MIDI instrument must be loaded in Ableton. You can do this by dragging and dropping a MIDI file into a MIDI track or by selecting an instrument from the “Instruments” or “Sounds” tab in the Ableton Live Browser.
Step 2: Select the MIDI Clip
Once you have loaded a MIDI instrument in Ableton, select the MIDI clip you want to edit. To do this, click on the name of the MIDI clip in the Clip View. It is located in the bottom half of the Ableton Live interface.
To create a new MIDI clip, select the number of bars you desire, right-click, and select the function “Insert Empty MIDI Clip(s)” to create an empty MIDI clip over the bars you chose.
Step 3: Open the Piano Roll
To open the piano roll, you can either double-click on the MIDI clip in the clip view or right-click on the MIDI clip and select “Edit MIDI Clip” from the context menu. Alternatively, you can use the keyboard shortcut “Command + Shift + M” (Mac) or “Control + Shift + M” (Windows) to open the piano roll.
Step 4: Edit MIDI Notes
Once you have opened the piano roll, you can edit MIDI notes by clicking and dragging them with your mouse. You can also use the pencil tool to draw new MIDI notes, the eraser tool to delete existing MIDI notes, and the selection tool to move or resize MIDI notes.
Step 5: Adjust Note Properties
In addition to editing MIDI notes, you can adjust their properties in the piano roll. This includes changing the
- changing the note length, velocity, pitch,
- adding or removing note expressions and automation.
Step 6: Close the Piano Roll
When you’re done editing the MIDI clip, you can close the piano roll by clicking on the “X” button in the upper left corner of the window or by pressing the “Escape” key on your keyboard.
Ableton Live 11 Basics
The Ableton MIDI Editor (a.k.a. Piano Roll) offers great functions that allow you to have an extremely fast workflow and easy navigation. Here, let’s take a look at some of the basic functions.
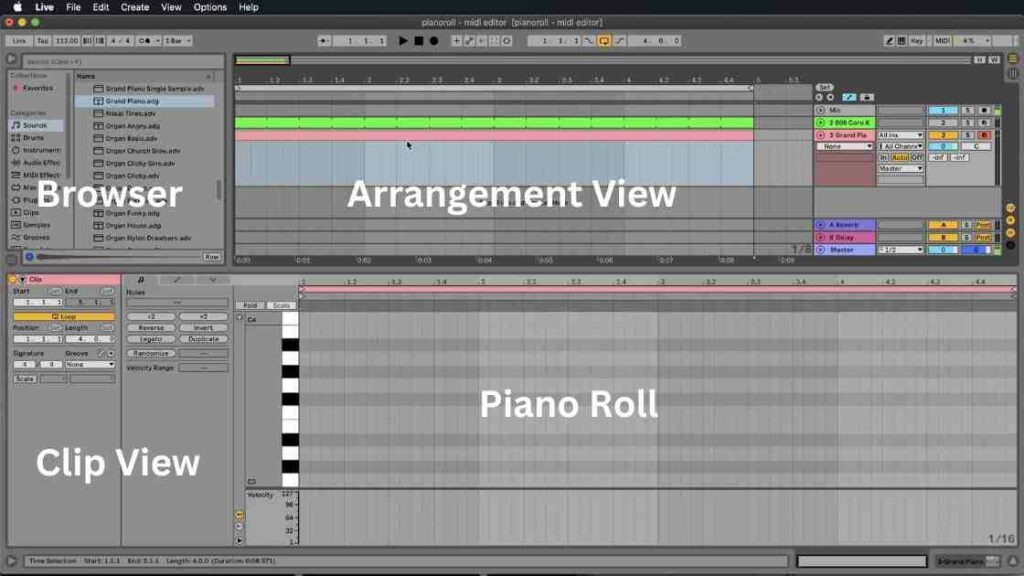
The Browser
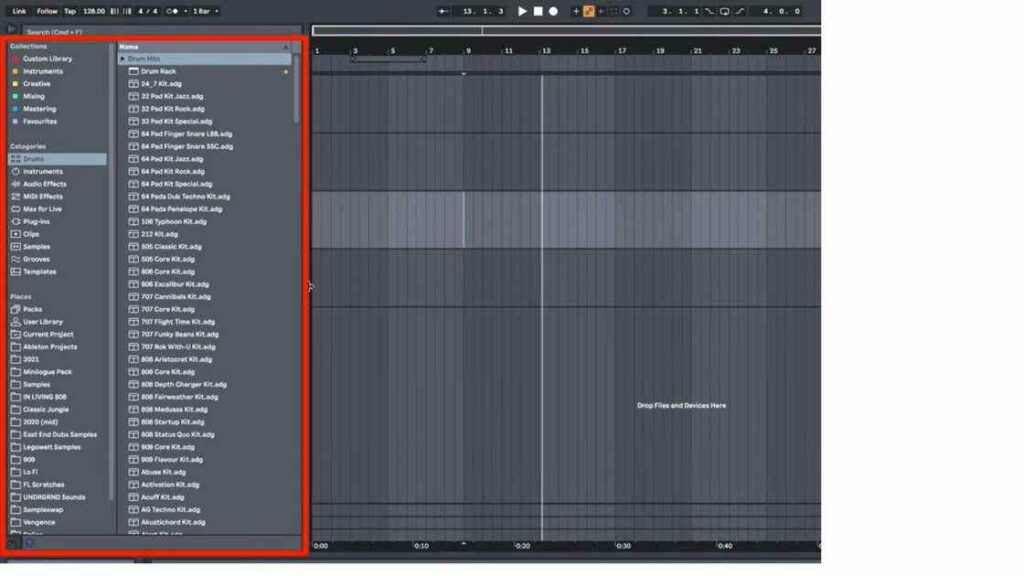
The Ableton Browser is an important box that you will always use. It is where you select sounds, choose virtual instruments, listen to samples, import or export files, etc. The functions in Categories and Places are self-explanatory.
It would be worth a while to spend some time to get yourself familiar with the functions in the Browser.
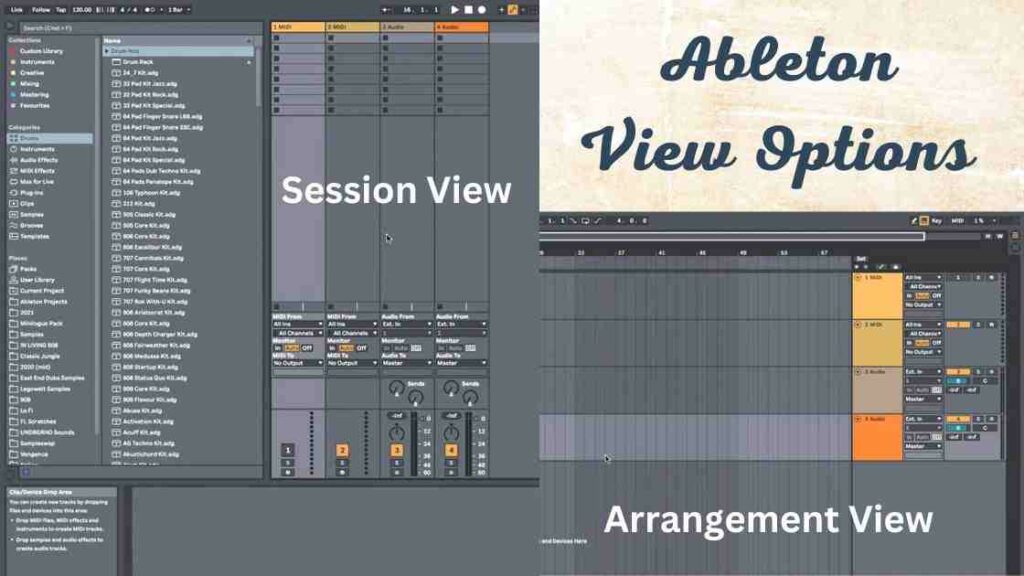
Ableton offers Session View and Arrangement View. Both are easy to manage and navigate. You can easily toggle between them using the button on the upper right corner of the Ableton interface.
The Session View presents the MIDI tracks in vertical columns resembling an analog mixing console.
Personally, I prefer the Arrangement View. I feel it makes the MIDI tracks more visual and easier to align with the Piano Roll.
Many little things Abelton offers make your creating and editing music process much easier. To name a few:
- Easy zoom in and zoom out by moving your mouse up and down.
- Selected features are highlighted on the screen.
- Drawing music notes using the pencil tool.
- Duplicate or loop a section effortlessly.
- Drag and drop to import MIDI files.
How Do You Draw a Piano Roll in Ableton?
To draw a piano roll in Ableton, the steps are similar to opening a piano roll in Ableton. Here is a summary of the steps:
- Open a MIDI track in Ableton.
- Click on the “View” button in the upper left-hand corner of the screen.
- Select “Piano Roll” from the dropdown menu.
- Click on the pencil tool in the upper left-hand corner of the piano roll view.
- Click and drag your mouse over the piano roll to create notes. The notes will appear as horizontal bars on the piano roll, with the pitch of the note determined by its vertical position.
- Adjust the length and timing of the notes by clicking and dragging their edges.
- Adjust the velocity of the notes by clicking and dragging the line above the note.
- Use the zoom tool of the piano roll view to zoom in and out of the piano roll.
- (Optional) Set up the looping or copy and paste any section as needed.
- Save your work frequently by clicking “File” and then “Save” in the upper left-hand corner of the screen.
That’s it! Drawing a piano roll in Ableton is straightforward.
How Do You Click on a Note in Ableton?
To click on a note in Ableton piano roll, you’ll first open the MIDI track and piano roll. Here is a summary of the steps:
- Open a MIDI track in Ableton.
- Click on the “View” button in the upper left-hand corner of the screen.
- Select “Piano Roll” from the dropdown menu.
- Use the scroll bars on the right-hand side of the piano roll to scroll to the desired location of the note you want to click on.
- Use the zoom tool of the piano roll view to zoom in and out of the piano roll if necessary.
- Use the mouse to click on the note you want to select. The note will turn blue to indicate that it is selected.
- To deselect the note, click on an empty area of the piano roll.
Click on a note in Ableton piano roll is easy. You can also turn on the speaker icon to hear the note you click.
Conclusion
Opening the piano roll in Ableton Live is a simple process. It allows you to edit and program MIDI notes for various instruments and drum sets. Following the six steps outlined in this article, you can quickly and easily open the piano roll in Ableton and edit your MIDI clips to create amazing music.
Have fun and enjoy!!!
Related Articles: